2026-03-30
Content
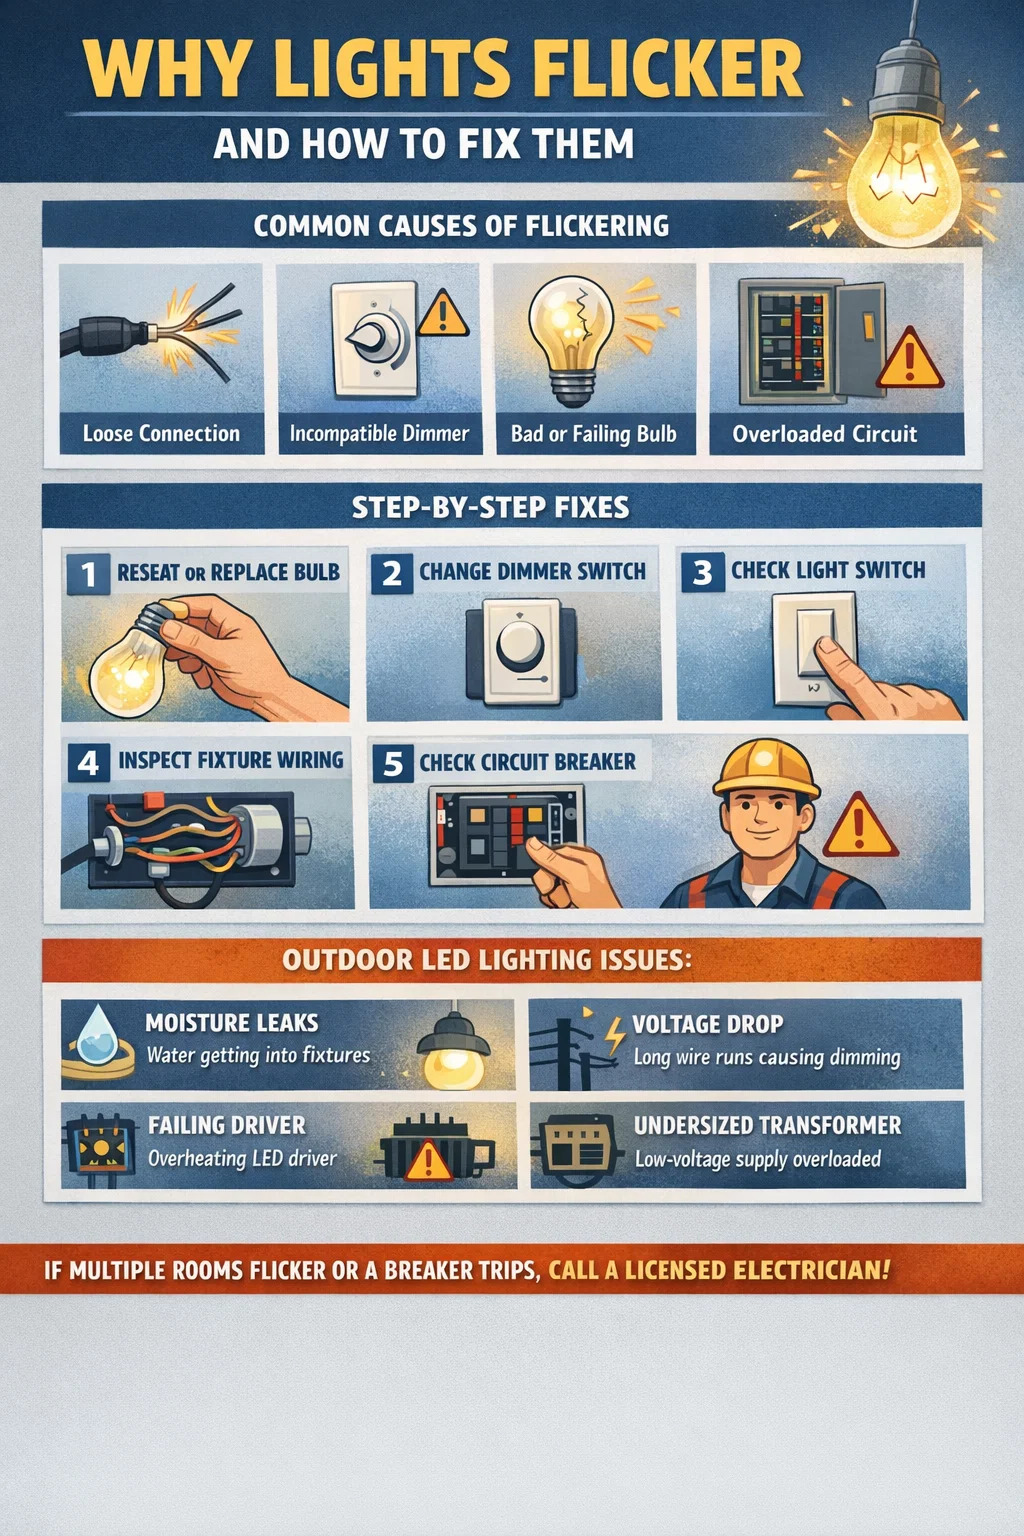
Flickering lights are almost always caused by one of four things: a loose or faulty connection, an incompatible dimmer switch, a bulb that is failing or mismatched to the fixture, or an overloaded circuit. In most cases, you can fix the problem yourself by tightening connections, swapping out the bulb, or replacing the dimmer. If the flickering affects multiple rooms or trips a breaker, you are dealing with a wiring or panel issue that requires a licensed electrician.
This guide walks through every common cause of flickering — indoors and outdoors — and gives you a clear, step-by-step path to diagnosing and fixing the problem. Outdoor LED lighting systems have their own specific failure points that differ from indoor incandescent setups, so those are covered separately in their own section.
Not all flickering looks the same, and the pattern tells you a lot about the root cause. Before you touch anything, observe the flicker carefully for two to three minutes.
If the light flickers at no particular interval — sometimes every few seconds, sometimes not for an hour — the most likely culprit is a loose connection inside the fixture, at the wall switch, or at the breaker panel. Loose wires arc slightly as current passes through the gap, producing an irregular flicker. This is also a fire hazard, so treat it as urgent.
If lights dim or flicker every time a large appliance — refrigerator, air conditioner, washing machine — starts up, the circuit is experiencing a voltage dip. Large motors draw a surge of current at startup, sometimes three to six times their running current, which drops voltage momentarily across the whole circuit. Occasional brief dimming (under three seconds) when a major appliance starts is normal. If it lasts longer or happens every cycle, have an electrician check your panel capacity and wiring gauge.
A consistent, fast flicker — often visible as a faint strobe — usually points to a dimmer compatibility issue with LED bulbs, or a failing LED driver. Some cheap LED bulbs flicker at 100–120 Hz, which is fast enough that many people cannot see it directly but can perceive it as eye fatigue or headaches after prolonged exposure.
Some LED bulbs flicker briefly at startup — within the first one to five seconds — because the internal driver is stabilizing. If it stops after that, the bulb is functioning normally, though cheaply built. If the flicker continues past warm-up, the driver is failing and the bulb should be replaced.
Turn off the light at the switch. Wait two minutes for the bulb to cool if it is incandescent or halogen. Then screw the bulb in firmly — not aggressively, just snug. A bulb that is even slightly loose will make intermittent contact with the socket and flicker. If the fixture uses a pin-base bulb, pull it out and re-seat it. Turn the power back on and observe for five minutes.
If reseating does not fix it, replace the bulb — even if it looks fine. Incandescent and halogen bulbs flicker as the filament ages and develops thin spots. LED bulbs flicker when the internal driver fails, which can happen at any point in their lifespan, though it is more common after 15,000 to 20,000 hours of use or in fixtures with poor heat dissipation. When replacing, always match the wattage rating of the fixture and use a quality bulb from a recognized brand.
This is one of the most common causes of LED flickering that gets overlooked. Traditional dimmers were designed for incandescent bulbs, which have a much higher minimum load — typically 40 to 60 watts. Modern LED bulbs may only draw 5 to 10 watts each, which is below the dimmer's minimum load threshold. The result is flickering, especially at lower dim settings.
The fix: replace the dimmer with one that is explicitly rated for LED loads. Look for dimmers labeled "LED compatible" or "CFL/LED dimmer." Brands like Lutron and Leviton publish compatibility lists on their websites — cross-reference your specific bulb model before purchasing a dimmer. If you have multiple LED bulbs on a single dimmer, add the total wattage and ensure the dimmer's maximum load rating exceeds it.
Switches wear out. The internal contacts corrode or loosen over time, especially in humid environments like bathrooms or kitchens. Turn off the breaker for that circuit, remove the switch cover plate, and pull the switch out of the box. Look for discoloration on the wire terminals (browning or blackening indicates arcing), and check that all wires are firmly secured under the screws or in the backstab holes. Backstab connections — where the wire is simply pushed into a hole — are notoriously unreliable and should be replaced with screw-terminal connections if you find them. If the switch itself looks worn, replace it; a standard single-pole switch costs under $5.
Turn off the breaker. Remove the fixture and inspect the wire connections inside the junction box. The wires should be joined with wire nuts — check that each nut is tight and that no bare copper is exposed outside the nut. If the wires are connected with old push-in connectors, replace them with properly sized wire nuts. Also look for any scorch marks, melted insulation, or wires that look brittle and cracked. Any of those signs mean the fixture needs to be replaced or professionally rewired before use.
If the flickering affects every light on a circuit — or multiple circuits — go to your breaker panel. Look for a breaker that is not fully in the ON position, or one that feels warm to the touch. A failing breaker can deliver inconsistent current. Try flipping the breaker fully off, then back on. If the problem returns or the breaker trips, the breaker itself may need replacement. Do not attempt to replace a breaker unless you are familiar with panel work; the bus bars inside a panel remain live even when the main breaker is off.
Outdoor LED lighting operates under conditions that do not apply indoors — temperature swings, moisture, UV exposure, and longer wire runs between driver and fixture. Each of these factors introduces failure points that are unique to exterior installations.
Water is the number-one enemy of outdoor LED lighting. Even fixtures rated IP65 or higher can develop leaks over time as gaskets degrade or mounting screws loosen. Water inside a fixture corrodes the LED board contacts and the driver terminals, producing intermittent flickering that worsens in humid or rainy conditions. If the flickering happens mostly after rain or on humid nights, moisture ingress is almost certainly the cause.
To check: power down the circuit, open the fixture, and inspect for water stains, corrosion (white or green deposits on metal parts), or actual pooled water. Dry the fixture thoroughly with compressed air, apply dielectric grease to all terminals, reseal any gaps with weatherproof silicone, and replace the gasket if it is cracked or compressed flat. If corrosion has reached the LED board, the fixture needs to be replaced.
Outdoor lighting — particularly low-voltage landscape lighting systems — often runs wires over distances of 50 to 150 feet or more from the transformer to the fixture. Resistance in the wire causes voltage to drop proportionally with distance. If the driver in the LED fixture receives voltage outside its rated input range — say, 10V instead of 12V — the driver may struggle to maintain a stable output, resulting in flickering.
Use a multimeter to measure voltage at the fixture terminals while the light is on. For a 12V system, anything below 10.8V is too low. Fixes include upgrading to a heavier wire gauge (12 AWG instead of 16 AWG), daisy-chaining fewer fixtures per run, or moving the transformer closer to the load. For high-voltage (120V/240V) outdoor LED lighting, voltage drop is less common but can still occur on long runs with undersized conduit wire.
The driver — the component that converts AC mains power to the DC current LEDs require — is the most failure-prone part of any outdoor LED lighting fixture. Heat accelerates driver degradation, and outdoor fixtures that are exposed to direct sun on warm days can see internal temperatures that shorten driver lifespan significantly. A failing driver typically manifests as flickering that gets worse as the fixture heats up over the first 20 to 30 minutes of operation.
If your fixture allows driver replacement (many commercial-grade outdoor fixtures do), source a driver with matching output voltage, current, and wattage rating. For integrated residential outdoor LED lighting fixtures where the driver is not field-replaceable, the fixture must be replaced entirely.
Outdoor wiring connections in junction boxes, conduit fittings, or underground splice kits are exposed to thermal cycling — they expand in heat and contract in cold. Over years, this loosens terminal connections even when they were initially tight. Check every accessible wire connection in the outdoor circuit: at the panel, at any junction boxes along the run, at the transformer (for low-voltage systems), and at the fixture itself. Outdoor connections should use weatherproof wire nuts or waterproof lever connectors rated for direct burial if they are underground.
Low-voltage landscape lighting systems use a transformer to step household current down to 12V AC. If you have added fixtures to a system over time without upgrading the transformer, the total wattage of all fixtures may exceed the transformer's rated capacity. Running a transformer above its rated load causes voltage instability, which causes flickering across all connected fixtures. Calculate the total wattage of all fixtures on the system and compare it to the transformer's output rating — it should not exceed 80% of the rated capacity to allow headroom. If you are over that threshold, upgrade to a higher-capacity transformer.
The table below summarizes the most frequent causes of light flickering, where they typically occur, and the recommended fix for each.
| Cause | Where It Occurs | Recommended Fix | DIY or Electrician? |
|---|---|---|---|
| Loose bulb | Indoor / Outdoor | Reseat or replace bulb | DIY |
| Failing LED driver | Indoor / Outdoor LED | Replace driver or fixture | DIY (if driver accessible) |
| Incompatible dimmer | Indoor | Replace with LED-rated dimmer | DIY |
| Loose switch/fixture wiring | Indoor / Outdoor | Re-tighten or re-terminate connections | DIY (turn off breaker first) |
| Overloaded circuit | Indoor / Outdoor | Redistribute loads or add circuit | Electrician recommended |
| Moisture ingress | Outdoor LED lighting | Dry, seal, replace gasket or fixture | DIY |
| Voltage drop (long runs) | Outdoor LED lighting | Upgrade wire gauge or reduce run length | DIY / Electrician |
| Undersized transformer | Low-voltage landscape lighting | Upgrade to higher-capacity transformer | DIY |
| Failing breaker | Whole circuit | Replace breaker | Electrician |
| Utility supply fluctuation | Whole house | Contact utility provider | Utility company |
If every light in your house flickers simultaneously — including LED, incandescent, and any other type — and the flickering is not tied to an appliance startup, the issue may be outside your home entirely. Utility supply voltage in North America is standardized at 120V AC (±5%), meaning anything consistently below 114V or above 126V at your meter is outside acceptable range.
Causes of utility-side flickuation include a loose connection on the utility transformer serving your neighborhood, a failing utility transformer, or high load from neighbors on the same transformer tap. You can rent or buy an inexpensive plug-in voltage logger (under $50) to record your incoming voltage over 24 to 48 hours. If the log shows consistent dips or spikes outside the acceptable range, contact your utility company — they are responsible for supply quality up to the meter, and in most jurisdictions they must investigate and resolve it at no charge to you.
For sensitive equipment or critical lighting applications — such as commercial outdoor LED lighting installations — a power line conditioner or automatic voltage regulator (AVR) can buffer your load against utility fluctuations while you wait for the utility to address the issue.
Incandescent bulbs are essentially resistive heating elements — they respond to current fluctuations by simply glowing slightly brighter or dimmer, and the thermal mass of the filament smooths out very fast fluctuations. LEDs have no thermal mass. They are semiconductor devices that turn on and off at the exact rate of the current passing through them. Without a high-quality driver to regulate that current, even small variations in voltage become visible as flicker.
The driver is what separates a quality LED from a cheap one. A well-designed LED driver maintains constant current output regardless of input voltage variations, eliminates flicker by smoothing the rectified AC waveform, and does so across a wide temperature range. Budget LED bulbs and fixtures often cut corners on driver quality, using basic capacitor-based smoothing circuits that allow residual 100/120Hz ripple through to the LED — which is why two LED bulbs that look identical on the shelf can behave very differently in use.
When selecting outdoor LED lighting or indoor LED fixtures, look for products that specify a flicker index below 0.1 (often listed as "flicker-free" or "low flicker") and a driver with power factor above 0.9. These specs indicate a more sophisticated driver that will not only resist flickering but also run cooler and last longer.
Recessed cans trap heat, which degrades LED drivers faster than in open fixtures. If recessed downlights flicker after running for 20 to 30 minutes and the flicker worsens the hotter they get, thermal shutdown is the likely cause. Check that there is enough clearance above the fixture for air circulation, and that insulation is not packed directly against the fixture (unless it is rated IC — insulation contact). Switch to lower-wattage bulbs to reduce heat output, or upgrade to a retrofit kit with a higher-temperature-rated driver.
Old magnetic ballast fluorescent fixtures flicker at 60Hz — barely perceptible to most people but problematic for those sensitive to flicker, and plainly visible on video camera recordings. The fix is to replace the magnetic ballast with an electronic ballast, which drives the lamp at frequencies above 20,000Hz, eliminating visible flicker entirely. Alternatively, retrofit the fixture with LED tube replacements, which eliminates the ballast altogether. If a fluorescent light flickers intermittently and the tubes are relatively new, the ballast is likely failing and should be replaced.
Outdoor flood and security LED lighting fixtures often have integrated drivers that are not replaceable. When these flicker, especially units that use a motion sensor or photocell, the sensor itself may be the problem rather than the LED or driver. Photocells that are degrading can send unstable signals to the driver, causing rapid on/off cycling that looks like flickering. Test by bypassing the sensor temporarily — if the flickering stops, replace the photocell. Motion sensors can also trigger false activations from heat sources like HVAC exhaust or swaying tree branches, which creates an "intermittent on/off" effect that resembles flickering from a distance.
LED string lights flicker most often due to one of two causes: a damaged or corroded socket in the string (one failed socket can affect the entire run in some series-wired designs), or an underpowered plug-in transformer. Check the product's wattage rating against the total connected load, and inspect each socket for signs of corrosion or physical damage. For string lights used outdoors year-round, replacing corroded sockets is usually more practical than replacing the entire string — replacement sockets are widely available for common string light formats.
Most light flickering fixes are straightforward DIY tasks. However, there are situations where calling a licensed electrician is the right call — both for safety and because the problem genuinely requires expertise or tools you are unlikely to have at home.
Call an electrician if:
You can handle it yourself if:
Most flickering issues are preventable with a few straightforward habits and smarter product choices.
The price difference between a $3 LED bulb and a $10 one from a reputable brand often comes down entirely to driver quality. For indoor use, stick with brands that carry ENERGY STAR certification, which requires the driver to meet minimum flicker standards. For outdoor LED lighting, look for products with a high IP rating (IP65 or above for exposed locations), a rated lifespan of at least 50,000 hours, and clear documentation of the driver specifications.
If you are installing a new dimmer or new LED bulbs on a dimmed circuit, check the compatibility list before purchasing. Both the dimmer manufacturer and the bulb manufacturer typically publish compatibility lists. Mismatched dimmer-bulb combinations are the most avoidable cause of LED flickering.
Every spring, do a quick walk-around inspection of all exterior lighting. Check that fixture mounting is tight, gaskets are intact, and wire entry points are sealed. For low-voltage landscape systems, check transformer output voltage with a multimeter and inspect wire connections at each fixture hub. Catching a loose connection or degraded gasket early takes five minutes; replacing a fixture that has been water-damaged for two seasons takes much longer and costs more.
A standard 15-amp household circuit should not run more than 1,440 watts of continuous load (80% of 1,800W capacity). If you are adding outdoor LED lighting to an existing circuit that already carries other loads — an outdoor receptacle, porch light, GFCI outlet — calculate the total load carefully. Running near or above circuit capacity not only causes flickering but also increases fire risk.
Power surges — from lightning, utility switching, or large motor startups — can damage LED drivers instantly or degrade them progressively over time. A whole-house surge protector installed at the main panel costs $150 to $350 installed and protects every circuit in the home. For outdoor LED lighting installations in areas prone to lightning, individual in-line surge protectors at the transformer or driver are also worth considering.
It depends on the cause. A bulb that flickers because it is near end of life is not an immediate danger, though it should be replaced. A light that flickers because of a loose connection, arcing wire, or failing breaker is a potential fire hazard and should be investigated promptly. If you smell burning, see discoloration around switches or outlets, or if flickering is accompanied by a tripped breaker, stop using the circuit and call an electrician.
Yes. High-frequency flicker from LED drivers with poor ripple suppression — even when the flicker is not visually obvious — has been linked to eyestrain, headaches, and reduced visual comfort in multiple studies. The IEEE recommends a flicker index below 0.1 for general lighting environments. If you or others in your home experience unexplained headaches or eye fatigue, switching to high-quality, flicker-free LED bulbs is a reasonable first step.
Evening is peak demand time for the electrical grid, which can cause utility voltage to dip slightly — enough to affect sensitive LED drivers. Additionally, neighborhood loads shift significantly after dark (more lights on, less industrial load), which can cause minor voltage fluctuations. If the problem is consistent and nighttime-only, log your voltage over 24 hours to see if there is a supply-side pattern.
Air conditioner compressors draw a large startup current — sometimes six times their running current — which briefly drops voltage on the circuit. A momentary dimming of one to two seconds when the AC compressor starts is normal. If the flicker lasts longer, happens on circuits that are not shared with the AC, or is accompanied by other electrical issues, have an electrician evaluate your panel capacity and wiring.
Cold temperatures affect LED drivers differently than heat — in extreme cold, capacitors inside the driver become less effective, which can allow more flicker through to the LED. Additionally, thermal contraction can loosen wire connections. For outdoor LED lighting in climates with harsh winters, choose fixtures with drivers rated to operate down to at least -40°C / -40°F, and inspect all wire connections at the start of each cold season.
Smart LED bulbs can be more susceptible to flicker caused by dimmer incompatibility, because they use their own internal dimming circuitry. Installing smart bulbs on a circuit with a traditional dimmer switch often causes flickering — smart bulbs should always be used with the dimmer switch set to full power (or replaced with a standard on/off switch), and dimming controlled through the bulb's app or hub rather than the wall switch.

Contact Us for More Details
Contact Information
Add:
No. 8 Qingcang Road, Qiangjiao Town, 315612 Ninghai, Ningbo, China
Phone:
+86-574-83530320
Fax:
+86-574-83530330
E-mail:
Join our community and stay connected
 English
 Français
 Español


